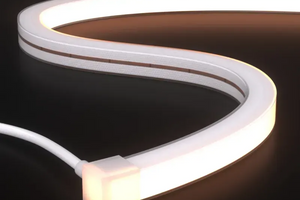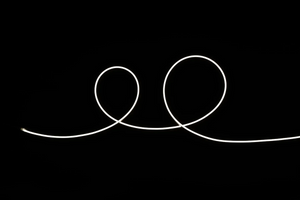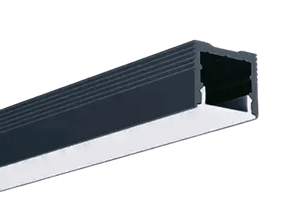
An LED strip cannot simply be bent 90° sideways (in the plane of the board) — the rigid copper traces and components between cut marks crack under a lateral bend, so the corner is handled with one of three methods: a flexible L-shaped connector with no soldering, a wire jumper across a cut in the strip, or a curved aluminum corner profile where the strip follows a large radius. A strip can only be freely bent "vertically" — wrapping around a round profile edge or a tube, in the same plane it already lies in. The rigid board cannot survive a sideways bend that turns the strip around a room or furniture corner. In this guide, the ARTLED team covers every working way to turn a strip 90°, how to pick the right radius, and where the typical installation mistake hides.
Three ways to route a corner: comparison
| Method | Soldering needed | Dark spot at the corner | Best for |
|---|---|---|---|
| Flexible L-connector (clip) | No | Minimal, connector is compact | Standard board width (8/10/12 mm), fast tool-free installs |
| Wire jumper across the corner | Preferred (or connector) | None if the jumper is hidden inside the profile | Concealed corners, non-standard strip width, addressable strips |
| Corner profile (strip stays uncut) | No | None, strip is continuous | Rounded corner profiles with a large bend radius |
Why you can't just bend the strip around a room corner
A flexible LED strip has only one safe bend direction — the "vertical" one, where the board flexes within the same plane it lies in, for example wrapping around a round profile edge or a tube. That kind of bend doesn't damage the copper traces because they run along the length of the strip and simply flex slightly with the flexible substrate. A lateral bend — trying to turn the strip 90° "flat," so it changes direction along a straight room or furniture corner — is something the board cannot survive: the copper traces and contact pads between diodes sit tightly packed across the full width, and a sharp crosswise bend cracks them or tears them off the flexible base. That's exactly why a direct corner connection is always made with a separate element — a connector, a jumper, or a profile — never by bending the strip itself.
Flexible L-connector: the fastest no-solder method
A flexible corner connector is a short, pre-bent 90° flexible board with two clip terminals on its edges that snap onto the end of each strip section the same way a regular straight connector does. Key rules:
✓ The connector width must exactly match the strip width (8, 10, or 12 mm) — otherwise the contact prongs won't land on every copper pad.
✓ The pin count must match the strip type — 2 for monochrome, 4 for RGB, 5–6 for RGBW/RGB+CCT, 3 for addressable SPI. A connector with fewer pins simply won't join some of the channels.
✓ Pick an inner or outer corner type to match the actual mounting angle — connectors for an outer (convex) corner and an inner (room) corner have differently shaped boards.
✓ For waterproof strips, use a silicone corner connector with a sealing cap — a dry connector on an IP65/IP67 strip reduces the joint's protection to nothing.
Wire jumper across the corner: the most reliable method
The strip is cut at the marks on both sides of the future corner and joined with a length of wire that physically routes around the corner of the profile or wall. This method is a bit slower than a connector, but it doesn't depend on a ready-made corner part being available for your specific strip type.
✓ Cut the strip only at the cut marks, as close to the corner as possible on both sides — so the jumper stays as short as possible and doesn't waste extra profile length.
✓ Wire gauge — from 0.5 mm² for short corner jumpers (up to 15–20 cm); use thicker wire for high-power strips or longer detour runs.
✓ Leave a bit of slack in the wire for the bend itself at the corner — a wire pulled tight around a sharp profile corner gradually wears through its insulation on the sharp edge.
✓ Solder it rather than clip it if the corner will be closed off and inaccessible for future checks — a soldered joint has lower and more stable contact resistance over time than a connector.
✓ For addressable SPI strips, preserve the signal direction — the jumper's Data wire connects the output (DO) of the section before the corner to the input (DI) of the section after it, never the other way around.
A corner joint like this adds its own contact resistance, just like any other strip connection.
Corner profile: when the strip doesn't need to be cut at all
A separate option is a rounded corner LED profile designed specifically to let the strip pass through a corner without cutting it. The strip inside this kind of profile doesn't make a sharp 90° turn — instead it follows the profile's smooth internal radius, staying within its safe "vertical" bend plane. This is the neatest option, with no visible joint at the corner at all, but it only works if the profile's radius is not smaller than that particular strip's minimum bend radius (see the box above) — for dense addressable strips and rigid COB strips, even a rounded profile can still be too sharp.
RGB, RGBW/CCT, and addressable strips at a corner
| Strip type | Pins at the corner joint | What to watch for |
|---|---|---|
| Monochrome / single-channel CCT | 2 | +/− polarity is easy to mix up blind inside a narrow profile |
| RGB | 4 | A swapped channel in the corner connector will distort color across the whole run past the corner |
| RGBW / RGB+CCT | 5–6 | Ready-made L-connectors for 5–6 pins are less common — a jumper is often simpler |
| Addressable SPI (WS2812B, SK6812) | 3 (+, −, Data) | Data-in → Data-out direction must be preserved; a corner connector for addressable strips must be an addressable one, not a generic connector |
Common mistakes
The most frequent mistake is trying to bend the strip sideways right at the corner without cutting it, which cracks the board and dims some of the diodes past the corner either immediately or over time as a trace microcrack develops. Other common issues include: a connector with the wrong board width or pin count, a dry connector on a waterproof strip, a jumper wire that's too short and pulled tight around a sharp profile corner, mixed-up polarity or color channels because the corner was too dark to see clearly during install, and a generic corner connector used on an addressable SPI strip instead of an addressable-specific one.
Frequently asked questions
Can you avoid cutting the strip at a corner entirely?
Only if the corner runs through a rounded profile with a radius no smaller than your strip's minimum bend radius. In a sharp 90° corner, the strip always has to be cut.
Which is more reliable — a flexible L-connector or a wire jumper?
A jumper with soldered ends is more reliable long-term — lower and more stable contact resistance. An L-connector installs faster and is plenty for most residential projects in dry rooms.
Does a corner joint affect brightness?
Yes, like any other joint — it adds a small amount of contact resistance. On a single corner the effect is negligible; it becomes noticeable only when several corner joints in a row sit near the length limit for your voltage.
Are there corner connectors for waterproof strips?
Yes — silicone corner connectors with a sealing cap for IP65/IP67 strips. For IP68 strips with a continuous silicone sleeve, a soldered joint sealed with heat-shrink tubing is more reliable.
Conclusion
A direct 90° corner connection for an LED strip is never made by bending the board itself sideways — only with a flexible L-connector, a wire jumper, or a rounded corner profile where the strip follows a large radius without being cut. For fast, dry installs, a clip connector matched to your strip's width and pin count is convenient; for concealed, long-lasting corners, a soldered jumper with sealing is the better choice.
ARTLED supplies flexible corner connectors for all standard LED strip widths and types, rounded corner profiles, and everything needed for soldered jumpers. The ARTLED team will gladly advise, free of charge, which corner connection method fits your profile and strip type best.