How to Backlight Your TV with LED Strips: Step-by-Step Guide
Backlighting behind your TV is one of the simplest upgrades for a home cinema setup. Your eyes strain less, the picture appears more contrasty, and the room gains atmosphere — all without any renovation. The entire installation takes 20–30 minutes.
What You Will Need
Before you start, prepare the following:
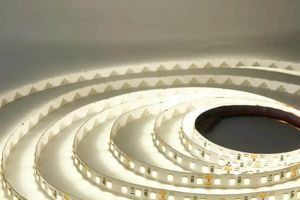
- LED strip (RGB or RGBW, 60 LEDs/m, length equal to the TV perimeter plus 20 cm extra)
- Power supply 12V or 24V of appropriate wattage
- Controller or dimmer
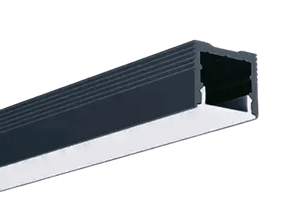
- Aluminium channel profile (optional, but extends the lifespan)
- Scissors, isopropyl alcohol wipe
How to measure how much strip you need: add the width and height of the TV's back panel together, then multiply by 2. For example, for a 55-inch TV (122 × 70 cm) the result is about 384 cm — buy 4 metres.
Step 1. Choose the Right Strip
The best options for TV backlighting are:
- RGB — if you want colour effects and do not plan to use the backlight as primary or supplementary room lighting
- RGBW — if you want both colours and the option to switch to neutral white
A power density of 4.8–7.2 W/m is sufficient. More is unnecessary: TV backlighting runs at reduced brightness, and excess wattage only heats the strip without any benefit.
12V voltage is the standard choice for runs up to 5 metres.
Step 2. Prepare the Surface
Degrease the back panel of the TV with an isopropyl alcohol wipe along the area where the strip will be applied. This is critical: on a dusty or greasy surface the adhesive layer will peel off within a few weeks.
Let the panel dry for 2–3 minutes.
Step 3. Apply the Strip
Stick the strip along the inner perimeter of the back panel, set back 1–2 cm from the edge. This way the light will spread evenly across the wall behind the TV, and the strip itself will remain invisible from the front.
Do not break the strip at corners — make a smooth bend instead. Most strips flex easily to 90 degrees without damage. If a strip is rigid, use corner connectors.
Where to cut: only at the designated cut marks (usually every 5 or 10 cm depending on the model). Cutting between marks is not allowed.
Step 4. Connect the Controller and Power Supply
The wiring scheme is straightforward:
- The strip connects to the controller
- The controller connects to the power supply
- The power supply plugs into the wall socket
The controller manages colour and brightness. Most modern controllers come with a remote or connect to a smartphone via Bluetooth or Wi-Fi.
If you want the backlight to turn on and off together with the TV, connect the power supply through a smart plug or to the TV's USB port (if the power supply supports it).
Step 5. Adjust the Brightness
The backlight behind the TV should not be bright. The goal is a soft glow that reduces the contrast between a dark screen and a dark wall. Optimal brightness is 20–40% of maximum.
Choose the colour to match your content:
- Neutral white or warm white — for films and TV series
- Blue or purple — for gaming
- Colours off, white only — for working with the TV as a monitor
Common Mistakes
Sticking without degreasing. The strip will fall off. Always wipe the surface before installation.
Choosing a strip that is too bright. 14.4 W/m is excessive for TV backlighting. Your eyes will tire and the strip will run hot.
Ignoring the power supply. Powering directly from the TV's USB port only works for strips specifically designed for it. A standard RGB strip requires a dedicated power supply.
Cutting in the wrong place. Cutting between the marks will damage several LEDs and leave a dark spot on the strip.
Summary
Four metres of strip, a power supply, a controller, and 30 minutes of work. The result — comfortable viewing without eye strain and a room with real atmosphere.
If you are not sure what to choose for your TV, send us the screen size and we will put together a kit for you.