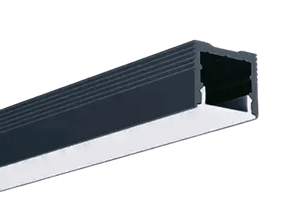
How to Seal Cut Ends of Flexible LED Neon
Every cut end of flexible LED neon must be sealed with an end cap and sealant. After cutting, the silicone housing no longer protects the internal circuit board from moisture, dust and mechanical damage. An open end can allow water and condensation inside, causing contact oxidation and failure of part of the neon.
This guide applies to flexible LED neon rated at 12V, 24V and 48V. All of these models require a suitable constant-voltage power supply. Before starting, check the product markings and the manufacturer’s instructions.
Why the cut end must be sealed
Flexible neon has a continuous silicone housing that protects the LEDs and circuit board. Cutting opens this housing and exposes the internal contacts to moisture.
An unsealed end can cause:
- oxidation of contact pads;
- corrosion of conductors and LEDs;
- flickering or partial loss of light;
- a short circuit after water enters;
- loss of the stated IP rating.
What you need
- an end cap for the exact neon profile;
- neutral silicone sealant;
- a sharp utility knife or scissors;
- a lint-free cloth;
- isopropyl alcohol or a compatible degreaser;
- gloves;
- adhesive-lined heat-shrink tubing for extra protection around the cable entry.
Which sealant to choose
Use a neutral silicone sealant compatible with silicone and plastic. It should remain flexible after curing and withstand temperature changes.
Do not use acid-cure silicone with a strong vinegar smell, hot glue as the only protection, ordinary electrical tape instead of an end cap, rigid adhesive that can crack when the neon bends, or sealant with unknown compatibility with the silicone housing.
Step-by-step sealing instructions
1. Disconnect the power
Disconnect the power supply before cutting and sealing. Never work on connected neon, even when using a low-voltage 12V, 24V or 48V system.
2. Find the marked cutting point
Cut the neon only where marked by the manufacturer. The cutting interval depends on the model. Cutting between marks may cause part of the segment to stop working.
3. Make a straight cut
Use a sharp tool and cut perpendicular to the neon axis unless the manufacturer specifies another direction. An uneven cut makes the end cap difficult to install and can create paths for water.
4. Prepare the surfaces
Remove dust and silicone residue from the end. If a wire must be soldered to the contacts, prepare the connection according to the manufacturer’s instructions. Then degrease the cut end and the inside of the end cap.
5. Apply the sealant
Fill the inside of the end cap with a small amount of neutral silicone sealant. Apply a thin layer to the edge of the silicone housing as well. Do not flood the entire end: excess sealant can reach the contacts or prevent the cap from seating correctly.
6. Install the end cap
Push the cap fully into place without twisting the neon. Remove excess sealant with a clean cloth before it begins to cure.
7. Seal the cable entry
If a cable exits through the end cap, carefully seal the area around it. For outdoor installation, adhesive-lined heat-shrink tubing can provide extra protection, but it does not replace the end cap and sealant.
8. Allow it to cure completely
Keep the neon still for the time specified by the sealant manufacturer. Full curing commonly takes about 24 hours. Do not power the product or immerse it in water before it has cured.
Specifics for 12V, 24V and 48V
The sealing method depends mainly on the neon design and installation conditions, not on the voltage. The same rules apply to 12V, 24V and 48V models: make a straight cut, use the correct cap and compatible sealant, and allow full curing.
| Voltage | Check | Typical use |
|---|---|---|
| 12V | Power supply compatibility, polarity and joint sealing | Decorative lighting, furniture, short lines |
| 24V | Total power and end protection on long lines | Ceiling contours, furniture, displays, facade elements |
| 48V | Power supply compatibility and reliable connections | Longer professional installations |
None of these versions should be connected directly to the electrical mains. A 12V, 24V or 48V system requires a power supply with the same output voltage.
Indoor and outdoor sealing
Dry indoor installation
In a dry room, sealing protects the end from dust and accidental contact. Even indoors, use the proper end cap with a small amount of neutral sealant.
Bathroom, kitchen or balcony
In damp areas, use an end cap and sealant compatible with the product’s IP rating. Do not place a joint where it is continuously exposed to water unless the neon is designed for those conditions.
Outdoor installation
On a facade or terrace, seal every cut end, cable entry and connection. Account for rain, condensation, UV exposure and temperature changes.
Common mistakes
- cutting outside the marked point;
- using an end cap with the wrong size or shape;
- installing an outdoor end cap without sealant;
- using acid-cure silicone;
- applying too much sealant inside the cap;
- powering the neon before curing is complete;
- connecting it to a power supply with the wrong voltage;
- bending the neon next to a fresh end cap;
- leaving the cable entry unprotected from running water.
How to check the result
- Make sure the end cap is straight and has no visible gaps.
- Check that sealant fills the edge around the housing and cable.
- After curing, inspect the cut: there should be no cracks or separation.
- Connect the neon to the correct 12V, 24V or 48V power supply.
- Check for even light output and no heating at the joint.
Frequently asked questions
Can I seal the end without a special end cap?
For a temporary dry indoor installation it may be possible, but permanent or outdoor installation requires the proper end cap.
Can I use hot glue?
It may hold the cap in place, but it should not be the only sealing method.
Can flexible LED neon be cut anywhere?
No. Cutting is permitted only at the points marked by the manufacturer.
Does 48V neon require a different sealant?
No. The choice depends on the cap and housing materials and the installation conditions.
When can I turn the neon on?
Only after the sealant has fully cured, usually after about 24 hours.
Conclusion
Sealing the cut end is an essential part of installing flexible LED neon. A straight cut at the marked point, the correct end cap, neutral silicone sealant and sufficient curing time provide a durable result.
The rules are the same for 12V, 24V and 48V neon. Only the model requirements, line length, power supply rating and operating conditions differ.