DIY Furniture LED Lighting: Wardrobes, Shelves and Bed
Adding LED lighting to furniture is one of the easiest ways to transform a room without renovation. LED strip is affordable, installs in a few hours, and delivers a noticeable effect: furniture looks more premium, the space feels cosier, and getting around in the dark becomes far more convenient. In this article we cover how to light up a sliding wardrobe, open shelves and a bed frame yourself — from choosing the right strip to wiring it up.
What You Will Need
Before you start, gather everything you need:
- LED strip of the required length and type;
- a 12 V or 24 V power supply (driver);
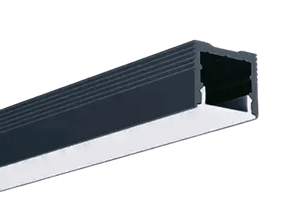
- aluminium channel with a diffuser cover — for a neat finish and strip protection;
- connectors or a soldering iron for joining sections;
- double-sided tape or screws for fixing the channel;
- a switch or dimmer — optional but recommended.
Measure the strip length with a small allowance. It is better to trim a little off at the end than to come up short at the last moment.
How to Choose an LED Strip for Furniture
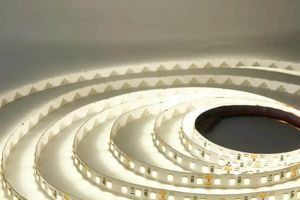
For furniture lighting, SMD 2835 or SMD 3528 strips are the most common choice. They are compact, produce even light, and fit neatly inside an aluminium channel. High power output is rarely needed for furniture — 4–9 W per metre is usually plenty.
Choose the light colour based on the task:
- warm white (2700–3000 K) — for bedrooms and living rooms, creates a cosy atmosphere;
- neutral white (4000 K) — for work areas and walk-in wardrobes where accurate colour rendering matters;
- cool white (6000 K) — for kitchens or home offices;
- RGB or RGBW — if you want colour-changing lighting with adjustable hues.
Pay attention to the Colour Rendering Index (CRI): for bedroom or wardrobe furniture, choose a strip with CRI 80 or above — this ensures clothes and objects appear in their true colours.
Lighting a Sliding Wardrobe
A sliding wardrobe is one of the most popular candidates for LED lighting. There are several mounting options to consider.
Interior lighting. Fix the strip along the top inner shelf or the side uprights. This illuminates the contents of the wardrobe well, making it easy to find what you need even in the evening. Consider adding a door-open sensor so the strip switches on automatically when you slide the door open and off when you close it.
Perimeter lighting. Mount the strip along the top or bottom edge of the wardrobe carcass to create a floating furniture effect. Bottom lighting casts a soft diffused glow onto the floor, which looks especially striking in the dark.
When wiring inside the wardrobe, hide cables in trunking or behind decorative covers. The power supply can sit on the top shelf or be fixed out of sight on the outside of the carcass.
Lighting Open Shelves
Lit open shelves are both practical and decorative. Correctly placed LED strips turn ordinary shelving into a focal point of the room.
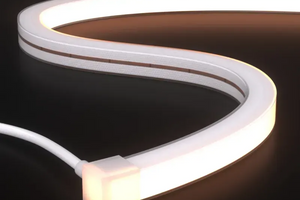
The most common approach is to fit the strip into an aluminium channel along the front or rear edge of each shelf. A channel with a frosted diffuser produces an even line of light with no visible hot spots — exactly what you need for a clean, professional look.
If the shelves are stacked one above another, link the strips between sections using short wire runs hidden behind the side panels. Connect the power supply at the top or bottom of the unit to keep the cable as discreet as possible.
For shelves holding books or ornaments, top-down lighting works best — it illuminates objects evenly. Bottom-up lighting gives a more dramatic, decorative effect.
Lighting a Bed Frame
Bed lighting is one of the most sought-after features in contemporary bedroom design. It comes in several forms.
Under-bed lighting. Fix the strip to the underside of the bed frame around its perimeter. It casts a soft, even glow onto the floor — perfect as a night light: it does not dazzle the eyes but is bright enough to move safely around the room at night. Warm white or a gentle colour tone works well here.
Headboard backlighting. Mount the strip behind the headboard panel or in the gap between the wall and the bed. The result is a soft halo of light around the headboard that gives the bedroom the look of a hotel suite. RGB strip is a great choice for this application — you can dial in any colour to suit your mood.
Connect bed lighting through a dimmer or a smart controller so you can adjust the brightness and switch it on and off from your phone or by voice command.
Installation and Wiring: Practical Tips
A few practical tips to help you avoid the most common mistakes:
- Always degrease the surface before applying the strip — this significantly improves adhesion.
- Never cut the strip at a random point: only cut along the marked cut lines (indicated by scissors or a dotted line).
- Calculate the power supply capacity with a 20–30% headroom above the total strip consumption.
- For long runs (over 5 metres), feed power from both ends of the strip — this eliminates brightness drop-off at the far end.
- The aluminium channel acts as a heat sink and extends the life of the strip — do not skip it.
Conclusion
DIY furniture lighting is a realistic project even without specialist skills. The key is to choose the right strip, prepare the surface properly, and take your time during installation. The result will surprise you: even a budget LED strip in an aluminium channel makes furniture look tidier and the whole room considerably more attractive. Start with a single piece — a set of shelves or a wardrobe — and you will quickly see just how simple and effective it really is.